

*this post contains affiliate links that I may or may not earn commission from at no additional cost to you*
Apparently I’m in my *~Furniture Makeover Era~*? (Tell me you’re in your 30’s without actually telling me!) Anyways, I spend a few minutes everyday hunting through Facebook Marketplace listings to see if I can find any cool pieces that I can turn into fun, DOABLE projects!
I tend to lean toward wooden furniture pieces, but I also don’t have access to a truck so I’m limited to smaller items that will fit in my Subaru. With all of these filters applied in my brain, I stumbled across a cool, old rocking chair for $30 that needed a little TLC, but had tons of potential.

I immediately messaged the woman about it and went to pick it up later that day. It was larger than I thought but luckily it still fit in my SUV so I packed it up and brought it home.
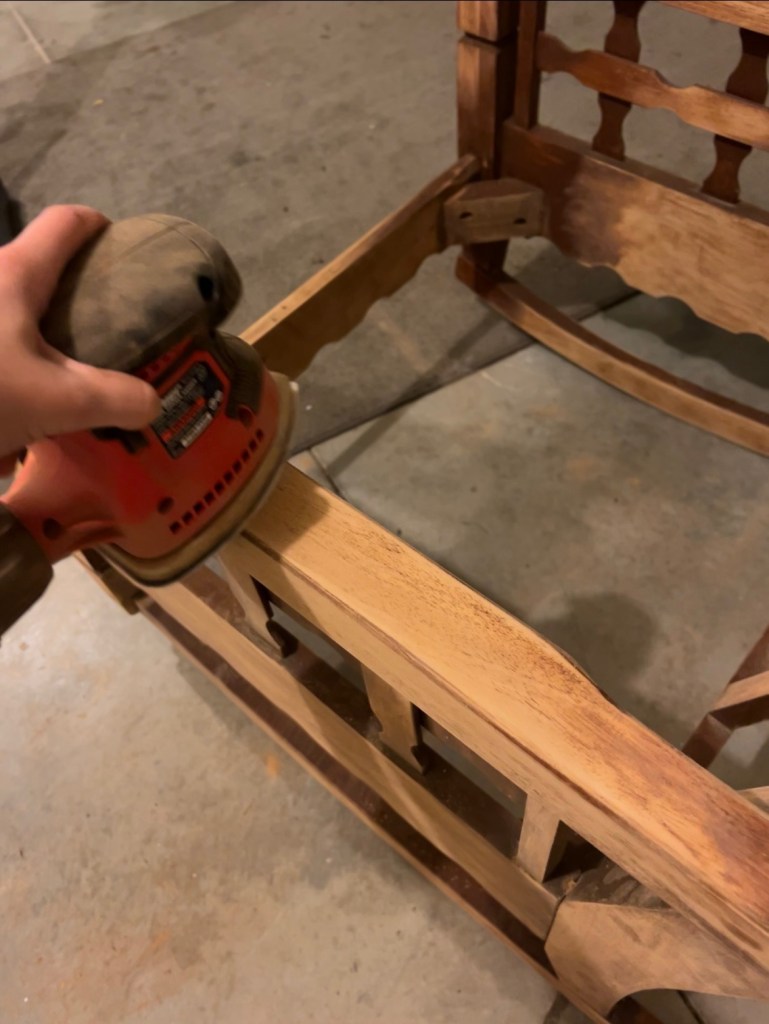
I knew it needed work but I didn’t have a wide variety of tools outside of your usual hammer, screwdriver, and drill. After a little research, I went to my local home depot and grabbed an inexpensive electric hand sander to get all the (who know’s how old) weird pain stain off of this thing and see what the wood looked like underneath.
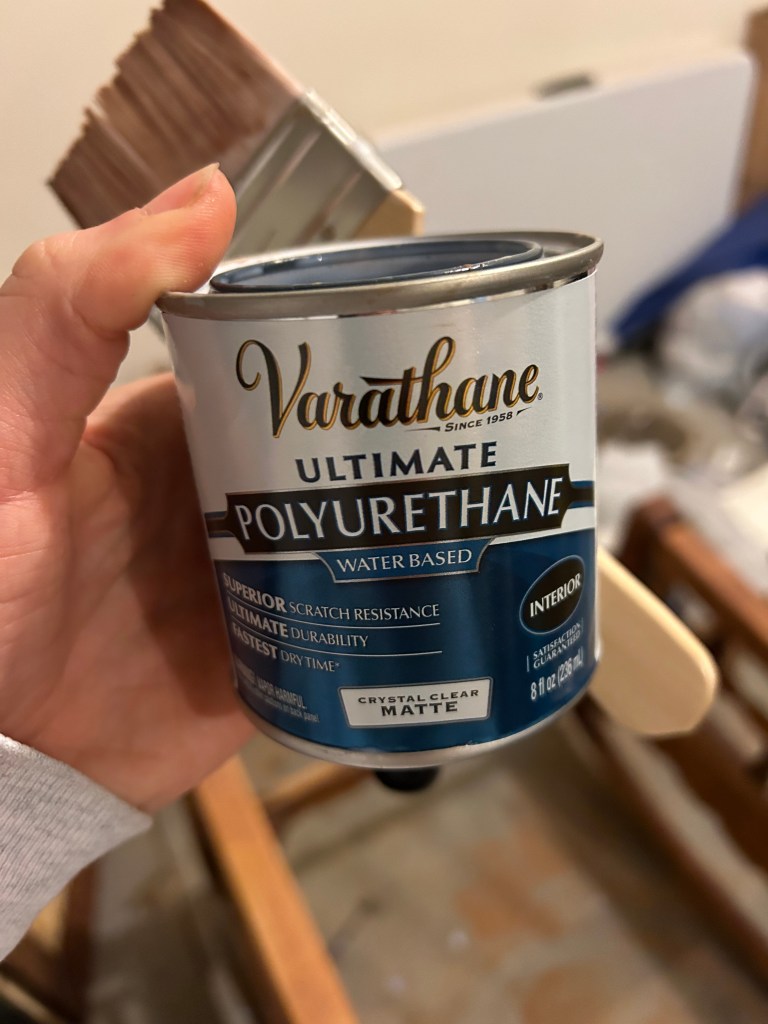
I originally planned on staining it but I actually liked how the original wood looked so after it was sanded down, I applied 3 coats of matte Polyurethane (letting it dry for about 2 hours between each coat).

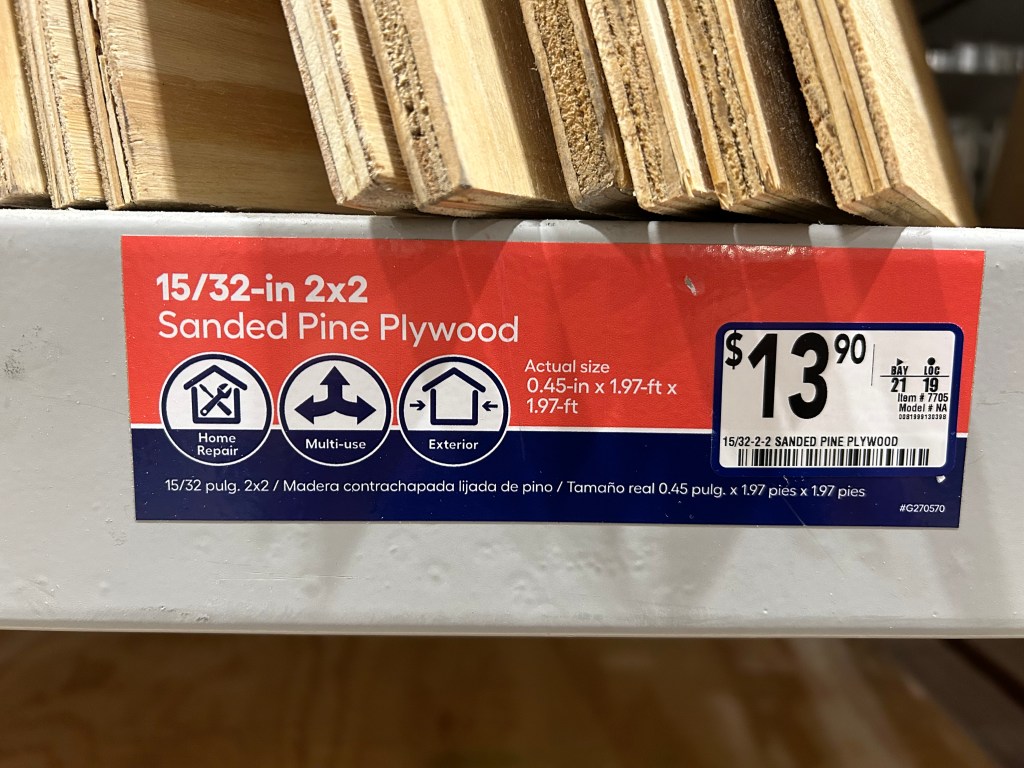
After that was complete and dry, I measured the seat area, because it didn’t have a seat when I bought it and I knew I’d have to make a new one. Luckily I found a piece of pre-cut pine plywood at the home improvement store that was the right size. I then went to the craft store and found the foam for the cushion and a clearance upholstery fabric that I liked. The two foam cushion squares were each 2″ thick, and I ended up using both of them (one on top of the other) for a thicker cushion.

Before assembling and attaching the seat to the chair, I applied three coats of fabric water shield (letting them dry in between) to protect the fabric from any spills or stains (because toddlers).
Once the fabric was ready I laid it down (fabric protected side up) and laid the cushion foam and wooden seat on top. I cut the fabric to fit, leaving a few inches on each side to ensure the fabric would cover the entire cushion and still be able to be attached on the bottom of the wooden seat. I used a staple gun to attach the fabric.
I then laid the entire upholstered seat on the rocking chair and screwed it on from below using an electric drill.
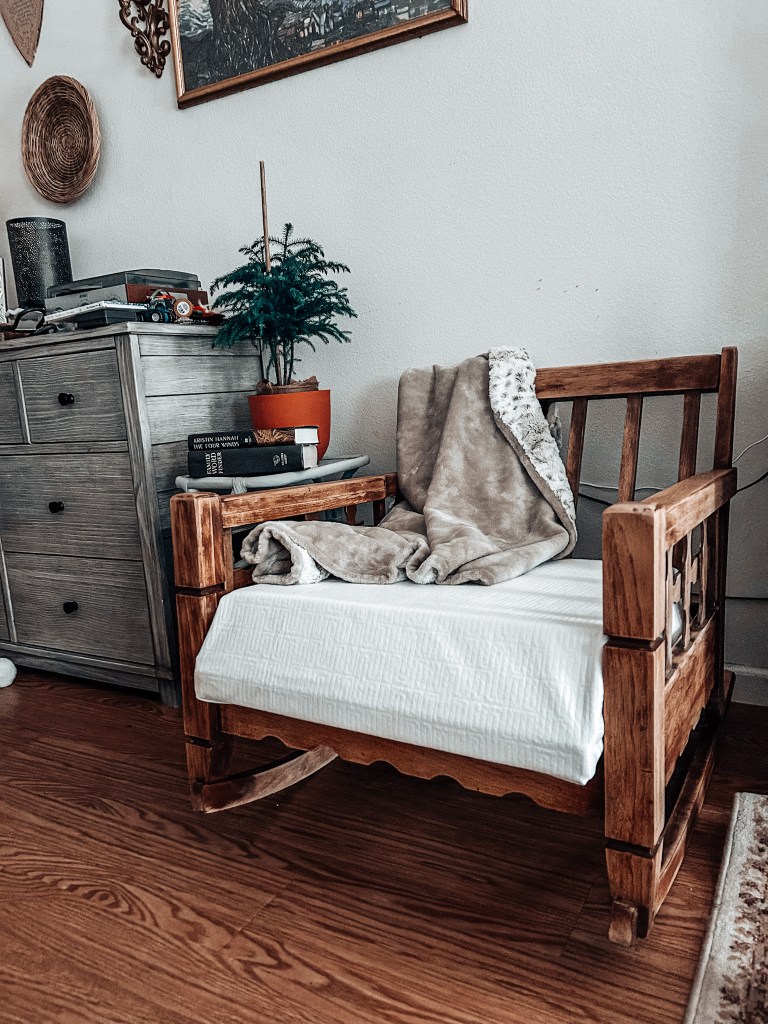
While this was my first time doing a project like this, I was overall happy with the result. I was always intimidated with these types of projects but I know now that it was actually fairly easy and not as time consuming as I thought it would be (outside of waiting for things to dry). I also saw the purchase of the products as an investment so I could do more projects like this in the future.
Find everything I used here.
Let me know what you think!

Leave a comment